


If you own a shed for storing tools, lawnmowers, or garden supplies, lifting heavy items in and out can be a real challenge. That’s where a shed ramp makes all the difference. It turns a tough task into an easy one—and building your own is simpler than you might think.
Without a ramp, moving heavy gear can strain your back or damage your shed. Plus, it limits what you can store inside. A DIY shed ramp lets you customize the size and materials—whether you prefer wood, metal, or aluminum—to fit your exact needs.
In this guide, we’ll show you how to build a ramp for a shed from start to finish, including planning, materials, tools, and easy step-by-step instructions.
1. Planning Your Shed Ramp: Get the Basics Right
Before grabbing tools, take time to plan your shed ramp—this avoids mistakes like a too-steep slope or a ramp that’s too narrow. Planning takes 30 minutes tops, but it saves you from redoing work later. Let’s break down the key steps.
1.1 Measure the Height of Your Shed Door
The first thing you need to know is how high your shed floor is off the ground—this determines how long your shed ramp needs to be. To measure:
- Grab a tape measure and place one end on the ground next to the shed door.
- Stretch the tape up to the bottom of the shed door (where the door meets the floor inside).
- Write down this number—let’s call it your “shed height.” For example, if your shed is 18 inches high, your shed ramp needs to be long enough to reach that height without being too steep.
Why this matters: If you skip measuring, you might end up with a ramp that’s too short (making it steep) or too long (wasting materials). For storage shed ramps, accurate height measurement is extra important—you don’t want a ramp that’s hard to push a handcart up.
1.2 Calculate the Ideal Slope Ratio
Slope ratio is how much the ramp rises for every foot it extends. A steep ramp is hard to use (especially with heavy items), while a too-flat one takes up too much space. The ideal slope ratio for a shed ramp is 1:12—meaning for every 1 inch of shed height, the ramp should be 12 inches long.
Let’s do the math with an example:
- If your shed height is 12 inches, your ramp length should be 12 x 12 = 144 inches (12 feet).
- If your shed height is 18 inches, your ramp length should be 18 x 12 = 216 inches (18 feet).
If you’re short on space, a maximum safe ratio is 1:8 (1 inch height = 8 inches length)—but this is steeper, so only use it for light items. Avoid ratios steeper than 1:8—they’re unsafe and hard to navigate. For a wood ramp for shed or metal shed ramp, sticking to 1:12 ensures it’s easy to use for everyone.
1.3 Determine Ramp Width and Layout
Your shed ramp should be at least 12 inches wider than your widest item—this gives you room to move without hitting the sides. For example:
- If your lawnmower is 36 inches wide, make the ramp 48 inches wide.
- For general use (carrying boxes or tools), a 36-inch wide ramp works well.
For layout:
- Decide if you want the ramp to line up directly with the shed door (straight) or angle slightly (if space is tight).
- Mark the ramp’s position with stakes and string—this helps you visualize the space and avoid obstacles like rocks or plants.
- For storage shed ramps, a wider ramp is better—you might need to move large storage bins or furniture in and out, and extra width prevents accidents.
1.4 Evaluate the Ground Condition
The ground under your shed ramp needs to be firm and level—otherwise, the ramp will sink or shift over time. Check the ground by:
- Walking over the area—if it’s soft (muddy or sandy), you’ll need to add a gravel base to firm it up.
- Using a level to check for slopes—if the ground slopes, you might need to dig down slightly on the high side to make it even.
What to do for different ground types:
- Soft soil: Add a 4-inch layer of compacted gravel (3/4 inch size) to create a stable base.
- Hard, flat ground: You can skip the gravel, but adding a weed barrier under the ramp prevents weeds from growing through.
- Uneven ground: Dig out high spots or fill low spots with gravel to make it level.
This step is crucial for all ramps, but especially for aluminum shed ramp or metal shed ramp—these materials are lightweight, so they rely on firm ground to stay stable. And once your ramp’s groundwork is solid, you’ll want a shed that maximizes that stable setup—like the AECOJOY 7'x3' Outdoor Horizontal Bike Storage Shed. This compact dark gray shed is perfect for pairing with your new ramp, since its 22.5 sq. ft. footprint fits neatly in small yards or patios (no need for extra space to accommodate a bulky structure). It’s built from heavy-duty galvanized steel too—sturdy enough to withstand 60 MPH winds and resist rust, moisture, and oxidation—so it’ll hold up just as well as your well-prepped ramp. Whether you’re rolling bikes, lawnmowers, or garden tools up your ramp and into the shed, its lockable doors keep your gear secure, and the seamless installation means you can have both ramp and shed ready to use in no time.

2. Choosing the Right Materials: Build It to Last
The materials you pick for your shed ramp determine how strong, durable, and easy it is to build. Whether you want a classic wood ramp for shed, a low-maintenance metal shed ramp, or a lightweight aluminum shed ramp, each option has pros and cons. Let’s break them down.
2.1 Wood Ramp for Shed Options
Wood is the most popular choice for shed ramp—it’s affordable, easy to cut, and works for most sheds. Here’s what you need to know:
- Best wood type: Pressure-treated lumber. It resists rot, insects, and moisture—critical for outdoor use. Avoid regular pine or cedar (they rot faster without treatment).
- Key pieces: Use 2x4s for the frame (joists) and 3/4-inch plywood for the ramp surface. For extra strength, add 4x4 posts for ground support.
- Pros: Cheap, easy to customize, works with any shed style. Great for beginners because wood is forgiving to cut and drill.
- Cons: Needs regular maintenance (re-stain every 1-2 years to prevent rot). Can get slippery when wet—so you’ll need an anti-slip finish.
A wood ramp for shed is perfect if you’re on a budget or want a ramp that blends with a wooden shed. It’s also easy to adjust if you need to fix or expand it later.
2.2 Metal or Aluminum Shed Ramps
Metal and aluminum are great for durability—they last longer than wood and need less maintenance. Let’s compare the two:
- Metal shed ramp: Usually made of steel. It’s super strong—can hold heavy items like riding lawnmowers. Pros: Durable, no rot, low maintenance. Cons: Heavy (hard to move alone), can rust if not painted. Best for sheds that store heavy equipment.
- Aluminum shed ramp: Lightweight but strong. It doesn’t rust and is easy to install (one person can carry it). Pros: Rust-proof, lightweight, low maintenance. Cons: More expensive than wood or steel. Best for small to medium sheds or if you need to move the ramp occasionally.
Both options work well for storage shed ramps—they handle frequent use and don’t warp or rot. If you live in a rainy area, aluminum shed ramp is a great choice because it won’t rust from moisture.
2.3 Fasteners & Hardware
Don’t skimp on fasteners—they hold your shed ramp together. Use outdoor-rated hardware to prevent rust:
- Screws: Use 3-inch deck screws (galvanized or stainless steel) for wood ramps. They’re stronger than nails and easier to remove if you need to adjust the ramp.
- Bolts: For metal or aluminum ramps, use 1/4-inch carriage bolts with washers. They keep metal pieces securely attached.
- Anchors: If your ramp is on soft ground, use metal anchors (stakes) to secure the ramp to the ground—this prevents shifting in wind or rain.
For a wood ramp for shed, avoid regular indoor screws—they’ll rust and break within a year. Spending a little extra on outdoor fasteners saves you from rebuilding the ramp later.
2.4 Anti-Slip Finishes
Slippery ramps are dangerous—especially when wet or covered in snow. Add an anti-slip finish to keep your shed ramp safe:
- For wood ramps: Use anti-slip paint (adds texture) or attach grip tape strips (easy to apply). You can also nail down 1x2-inch wood strips across the ramp (spaced 6 inches apart) for traction.
- For metal/aluminum ramps: Use rubber mats (cut to fit the ramp) or spray-on anti-slip coating. Avoid paint on metal—it can peel off over time.
Anti-slip finishes are a must for all ramps, but especially for storage shed ramps—you don’t want to slip while carrying heavy boxes. A simple anti-slip solution can reduce accident risks by 70%, making it a small step with big benefits.
Now that you know how to plan and pick materials for your shed ramp, let’s move on to the tools you’ll need—we’ve got a handy checklist to make sure you don’t forget anything!
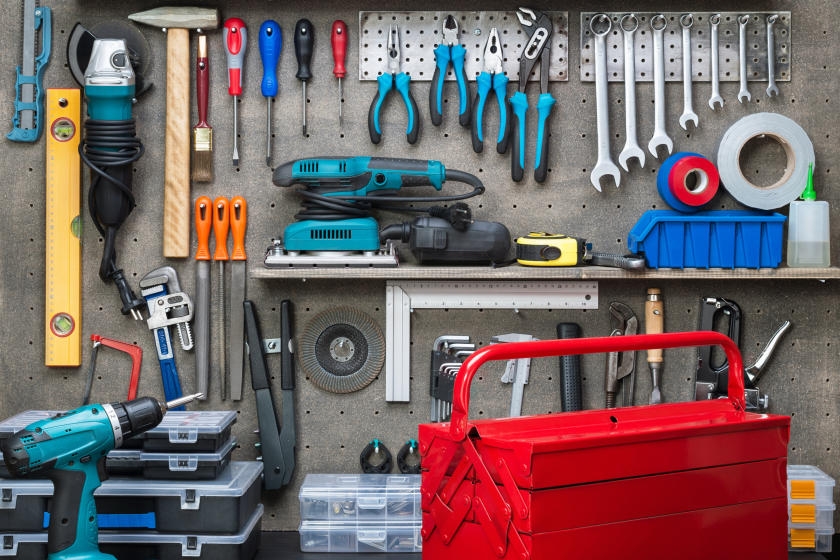
3. Tools and Supplies Checklist
Before you start building your shed ramp, make sure you have all the right tools and supplies. This checklist saves you from running to the store mid-project—we’ve organized everything by type for easy reference.
|
Category |
Items |
Purpose |
|
Measuring Tools |
Tape measure (25ft+), level (4ft), pencil |
Measure shed height, ramp length/width, and ensure level surfaces |
|
Cutting Tools |
Circular saw (or handsaw), utility knife |
Cut lumber (for wood ramp for shed), metal/aluminum (for metal ramps), or weed barrier |
|
Drilling/Driving Tools |
Cordless drill, drill bits, screwdriver bits |
Drill holes and drive screws/bolts into wood or metal |
|
Compacting Tools |
Tamper (or end of a shovel) |
Compact gravel base for soft ground (prevents ramp sinking) |
|
Shovels |
Garden shovel, rake |
Dig out high spots, spread gravel, and clear debris from the site |
|
Safety Gear |
Work gloves, safety glasses, ear protection |
Protect hands, eyes (from flying debris), and ears (from saw/drill noise) |
|
Lumber (for Wood Ramp) |
Pressure-treated 2x4s (joists), 3/4-inch plywood (surface), 4x4s (supports) |
Build the frame and surface of a wood ramp for shed |
|
Metal/Aluminum Supplies |
Pre-cut steel sheets (for metal shed ramp), aluminum panels (for aluminum shed ramp), metal brackets |
Assemble durable metal or aluminum ramps |
|
Fasteners |
3-inch deck screws (galvanized), 1/4-inch carriage bolts (with washers), metal stakes |
Secure ramp parts together and anchor to the ground |
|
Anti-Slip Materials |
Anti-slip paint, grip tape, rubber mats, 1x2 wood strips |
Add traction to ramp surface (prevents slipping in wet/snowy weather) |
|
Ground Prep Supplies |
Gravel (3/4 inch), weed barrier fabric |
Firm up soft ground and stop weeds from growing under the ramp |
Pro tip: Lay out all tools and supplies near the project site before starting—this keeps you organized and speeds up the build. For storage shed ramps, double-check that you have enough fasteners and anti-slip materials—these ramps get more use, so extra durability helps.
4. Step-by-Step Guide: How to Build a Ramp for a Shed?
Now that you have your tools and plan ready, let’s dive into building your shed ramp. We’ll use a wood ramp for shed as an example (it’s the most beginner-friendly), but we’ll note adjustments for metal shed ramp or aluminum shed ramp too. Follow these steps, and you’ll finish in a day!
Step 1: Prepare the Ground
First, get the area ready for your ramp:
- Clear the site: Remove grass, rocks, and debris from the ramp’s marked area (use the stakes/string from planning).
- Fix soft/uneven ground: If the ground is soft, spread a 4-inch layer of gravel and tamp it down firmly with a tamper—this creates a stable base. For uneven ground, dig out high spots or fill low spots with gravel until level.
- Lay weed barrier: Roll out weed barrier fabric over the ground (or gravel) and cut it to fit—this stops weeds from growing through the ramp.
For metal shed ramp or aluminum shed ramp, skip the gravel only if the ground is hard and flat—lightweight metal/aluminum needs firm ground to stay stable.
Step 2: Install the Ledger Board
The ledger board connects the ramp to the shed—this is key for stability:
- Cut a pressure-treated 2x4 to match the width of your ramp (this is the ledger board).
- Position the board against the shed’s side, so the top of the board lines up with the shed’s floor (use a level to check).
- Drill pilot holes through the ledger board into the shed’s floor joists (ask a helper to hold the board steady).
- Drive 3-inch deck screws through the pilot holes—space screws 12 inches apart to keep the board secure.
For metal/aluminum ramps: Use metal brackets instead of a ledger board. Attach brackets to the shed with bolts (instead of screws) for extra strength.
Step 3: Cut and Attach the Joists
Joists are the “bones” of the ramp—they support the surface:
- Calculate joist length: Use your ramp length (from planning) to cut pressure-treated 2x4s (joists). For example, if your ramp is 12 feet long, cut 2x4s to 12 feet.
- Space joists evenly: Place joists perpendicular to the ledger board, spacing them 16 inches apart (measured from the center of one joist to the next).
- Attach joists: Use 3-inch screws to fasten each joist to the ledger board. Add a metal joist hanger (optional but recommended) for extra support—this prevents joists from pulling away from the ledger.
For metal ramps: Use pre-cut steel joists (instead of wood) and fasten them to the metal brackets with bolts. For aluminum ramps, use aluminum joists—they’re lightweight but strong enough for most uses.
Step 4: Add Ground Supports
Ground supports keep the joists from sagging—critical for heavy items:
- Cut pressure-treated 4x4s to the height of your shed (these are the support posts). For example, if your shed is 18 inches high, cut 4x4s to 18 inches.
- Place a support post under each joist’s outer end (the end not attached to the ledger board). Use a level to make sure posts are straight.
- Secure posts: If using gravel, bury posts 6 inches into the gravel and tamp around them. If on hard ground, attach posts to the joists with screws and add a metal anchor (stake) to hold them in place.
For metal/aluminum ramps: Use metal or aluminum support posts (matching the ramp material) and anchor them to the ground with metal stakes—this keeps the ramp from shifting.
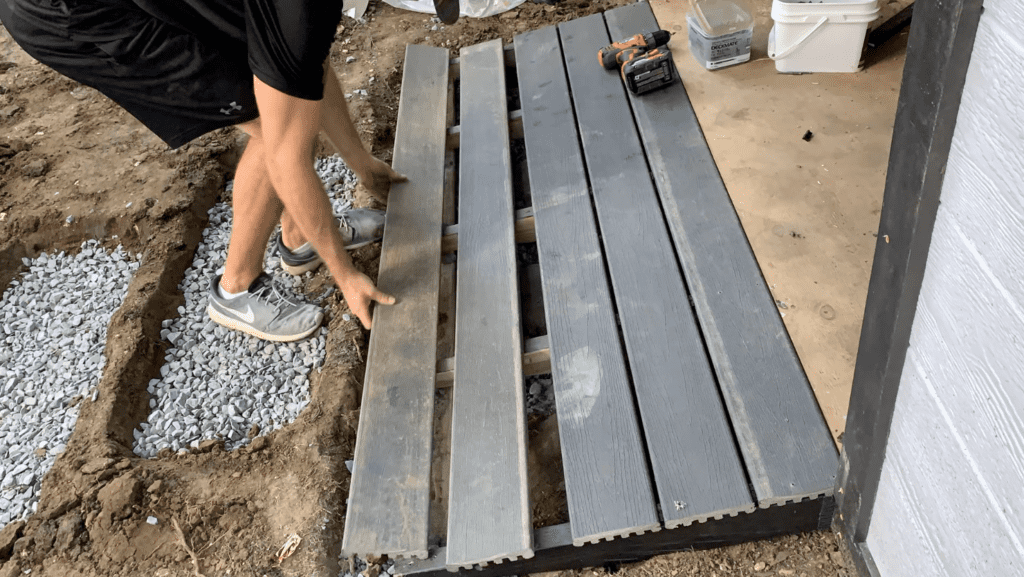
Step 5: Install Deck Boards
Deck boards create the ramp’s surface—this is what you’ll walk or roll items on:
- Cut 3/4-inch pressure-treated plywood to the size of your ramp (width x length). If your ramp is wider than a single plywood sheet, cut two sheets and line them up with a 1/8-inch gap (for expansion in wet weather).
- Lay plywood over the joists, making sure the edges line up with the joists (not hanging over).
- Attach plywood: Drive 2-inch screws through the plywood into each joist—space screws 8 inches apart along the edges and 12 inches apart in the middle.
- Add anti-slip finish: Once the surface is secure, apply your chosen anti-slip material. For wood, paint on anti-slip paint or nail 1x2 wood strips across the ramp (6 inches apart). For metal/aluminum, stick on grip tape or lay rubber mats.
For storage shed ramps, double-check the anti-slip finish—you’ll be moving heavy items often, so extra traction is a must.
Step 6: Test and Finish
The final step is to make sure your shed ramp is safe and ready to use:
- Test the ramp: Walk up and down it to check for squeaks or sagging. Push a heavy item (like a lawnmower or storage bin) up and down—if it feels stable, you’re good to go.
- Fix issues: If there’s squeaking, add extra screws to the loose spot. If it sags, add another support post under the sagging joist.
- Finish touches: Trim any overhanging plywood with a saw. For wood ramps, apply a coat of exterior stain (this extends its life). For metal ramps, add a coat of rust-resistant paint.
Congratulations—you just learned how to build a ramp for a shed! Whether it’s a wood ramp for shed, metal shed ramp, or aluminum shed ramp, this step-by-step process works for most setups. And with a durable storage shed like the AECOJOY 12x10 model, you’ll get even more use out of your new ramp by keeping all your outdoor essentials organized and protected.

5. Safety and Maintenance Tips
Your shed ramp will last for years with a little care—and safe use keeps you and your gear protected. Let’s cover the key safety rules and maintenance tasks.
5.1 Regular Inspections
Check your shed ramp every 3-6 months (and after big storms) to catch small issues before they get worse. Here’s what to look for:
- Loose parts: Tighten any loose screws, bolts, or support posts. For wood ramps, check for split or rotted joists—replace them if they’re soft or cracked. For metal ramps, look for rust spots—scrape them off and repaint with rust-resistant paint. For aluminum ramps, check for bent joists—straighten them with a rubber mallet (if minor) or replace (if major).
- Slippery surfaces: If the anti-slip finish is wearing off (e.g., grip tape peeling, paint fading), reapply it. This is extra important for storage shed ramps—slippery surfaces are risky when moving heavy items.
- Ground shifting: If the ramp is leaning or sinking, add more gravel under the support posts or adjust the anchors. Soft ground can shift over time, so this is a common fix.
5.2 Cleaning and Seasonal Care
Regular cleaning keeps your ramp in good shape, and seasonal care prepares it for harsh weather:
- Cleaning: Sweep the ramp every month to remove leaves, dirt, and debris—these can trap moisture and cause rot (for wood) or rust (for metal). Once a year, wash the ramp with a hose and mild soap—avoid harsh chemicals (they can damage anti-slip finishes).
- Winter care: Before snow/ice, add a layer of cat litter or sand to the ramp—this adds extra traction. After snow melts, sweep away any remaining debris and check for water damage. For wood ramps, make sure the anti-slip finish isn’t worn down—ice can make wood super slippery.
- Summer care: In hot weather, check for warping (wood) or expansion (metal/aluminum). If wood warps, add extra screws to hold it down. If metal/aluminum expands, make sure gaps (for expansion) are still there—if not, trim a small section to prevent cracking.
5.3 Replacement Guidelines
Even the best shed ramp will need parts replaced eventually—here’s when to swap out key components:
- Wood ramp parts: Replace joists or deck boards if they’re rotted, split, or soft (press on the wood—if it sinks in, it’s time to replace). Support posts should be replaced if they’re leaning or rotted at the base.
- Metal ramp parts: Replace rusted joists or brackets—rust weakens metal, making the ramp unsafe. If steel starts to bend under weight, swap out the bent pieces for new ones.
- Aluminum ramp parts: Replace bent or cracked joists—aluminum doesn’t rust, but it can bend if overloaded. If the anti-slip mats are peeling, replace them to keep the surface safe.
- Anti-slip finishes: Reapply every 1-2 years (or sooner if wearing off). This is a small cost compared to the risk of slipping and getting hurt.
For shed ramp ideas on upgrades, consider adding a handrail (for safety when walking) or extending the ramp (if you get a larger item later). These small changes make your ramp even more useful!
Conclusion
Building a shed ramp doesn’t have to be complicated—with the right planning, materials, and steps, even beginners can create a sturdy, safe ramp that makes accessing your shed a breeze. Whether you opt for a classic wood ramp for shed, durable metal shed ramp, or lightweight aluminum shed ramp, focusing on proper slope, firm ground prep, and anti-slip finishes ensures it serves you well for years.
Regular inspections and simple maintenance will keep your ramp in top shape, while following safety tips prevents accidents—especially important for storage shed ramps that see frequent use with heavy items. Now that you know how to build a ramp for a shed, you can stop struggling with lifting gear and start enjoying the convenience of a functional, custom ramp tailored to your shed’s needs.


